Brett Trafford Photography

  • Home
  • Services
    • Real Estate Photography
    • Commercial Photography
  • Training
  • Galleries
  • Blog
  • About
    • Bio
    • The Business
    • Our clients
    • T&C
  • Contact
  • Store
  • Exhibitions
Menu
  • Home
  • Services
    • Real Estate Photography
    • Commercial Photography
  • Training
  • Galleries
  • Blog
  • About
    • Bio
    • The Business
    • Our clients
    • T&C
  • Contact
  • Store
  • Exhibitions

Category Archives: Uncategorized

Lesson 9 Close up photography

/

July 15,

/ brett365

Time for your close up.

I love close up photography; it’s my fall back when I have nothing else to shoot as nearly every thing looks different when shot really close up. Also you can do it nearly any where and get fantastic results; the shots used here were taken just feet from my back door and in the rain. But what puts most people off is the thought that you need loads of expensive equipment and specialist knowledge, so here are a couple of shots and a breakdown of what was done.

The kit.

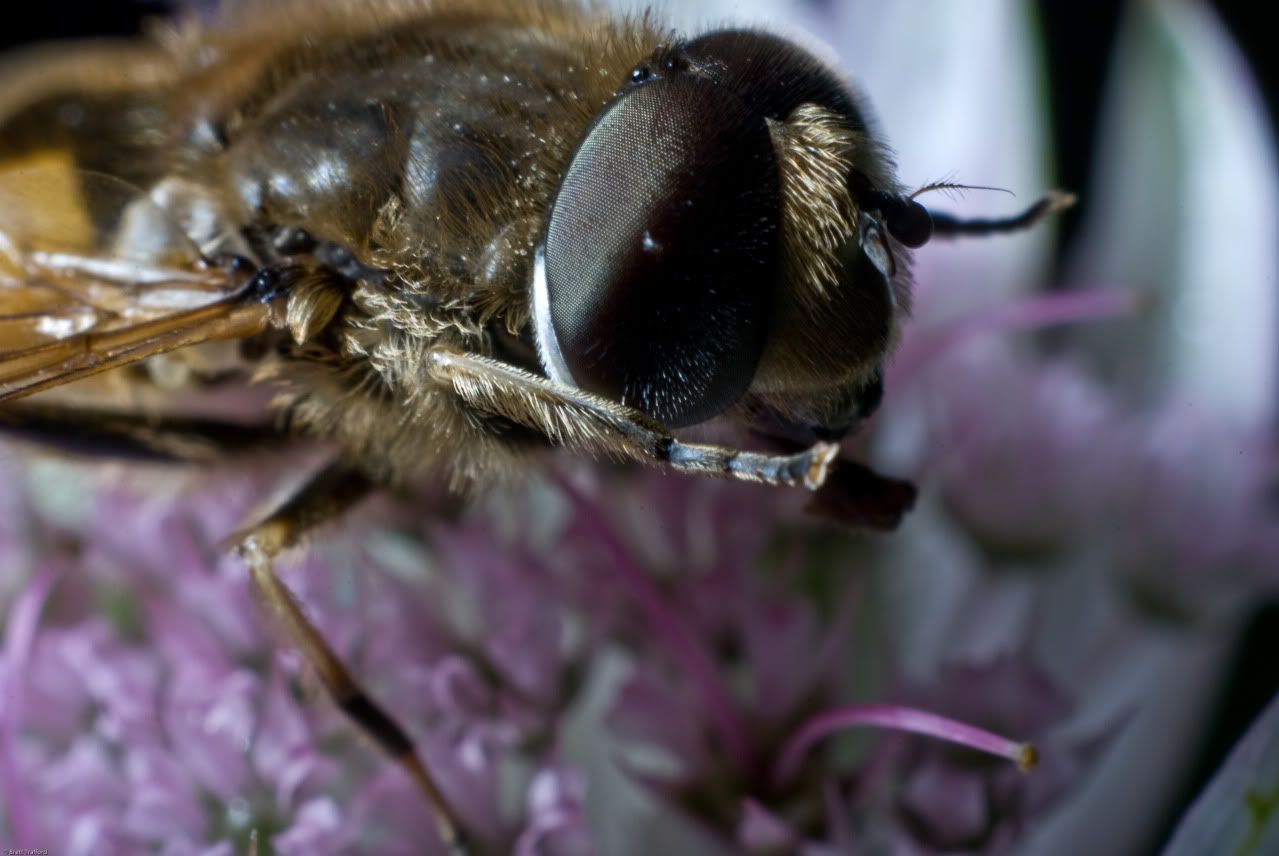
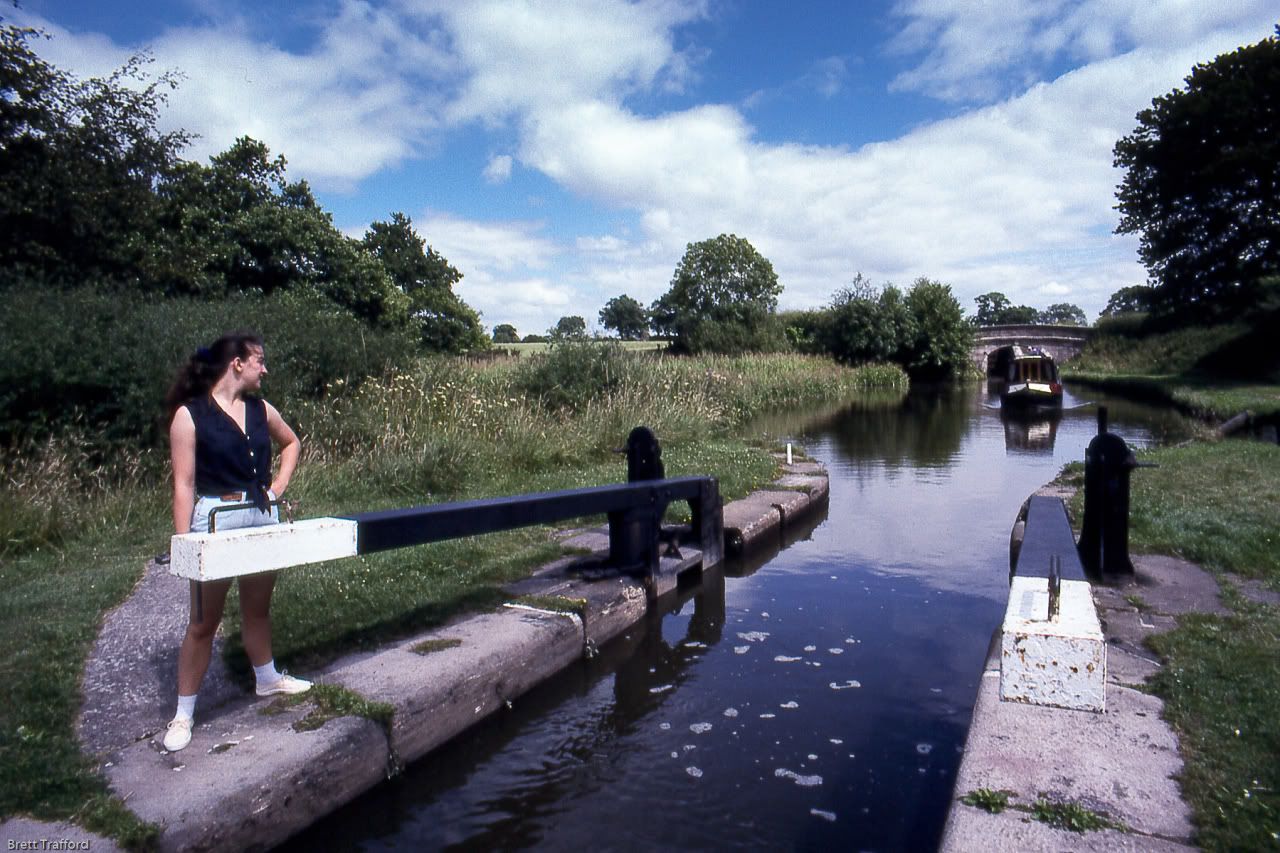
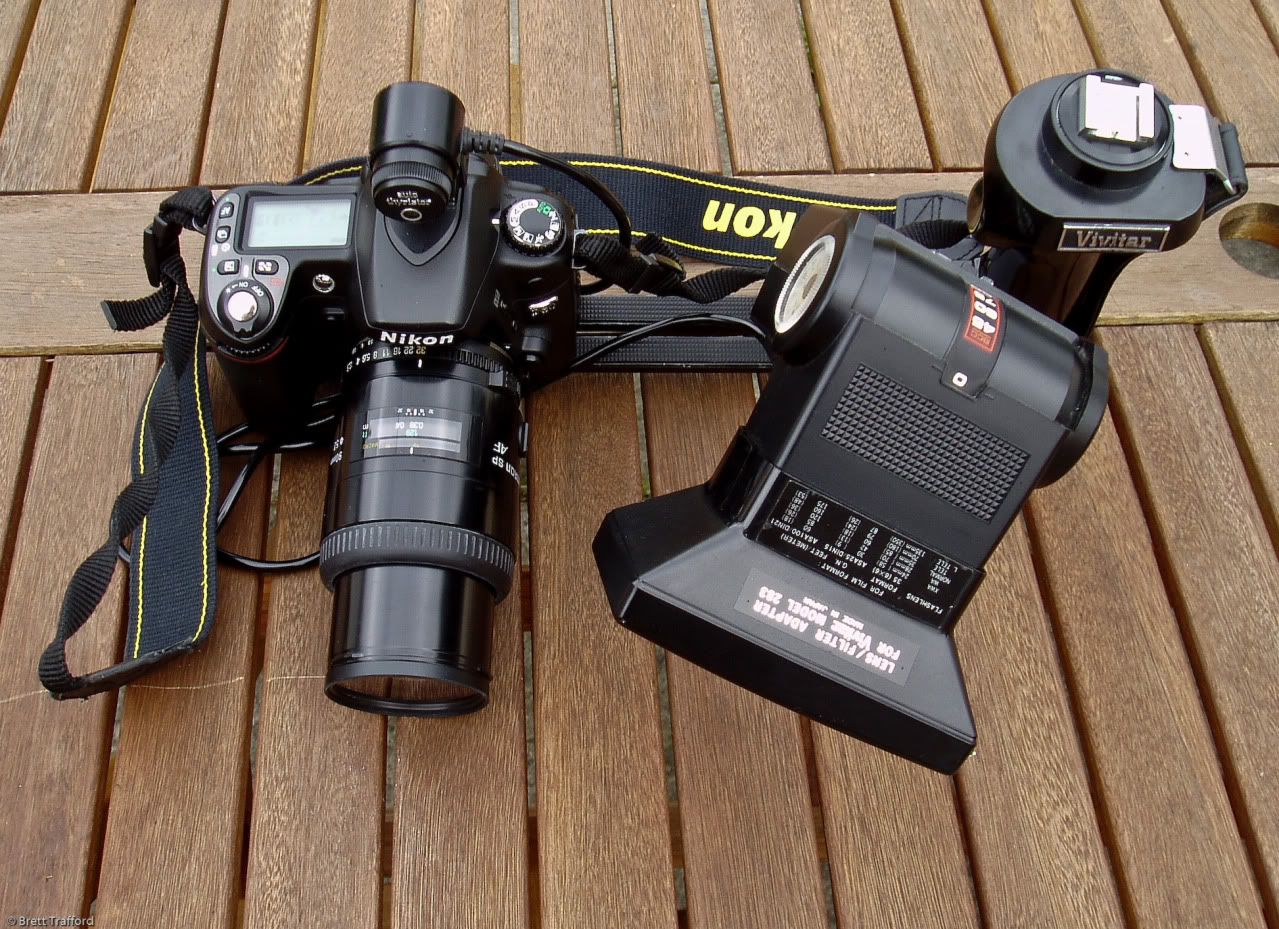
One of the best things I ever got for my camera was a special macro lens, mines a 90mm Tamron, the second I have owned having switched from the older manual version. What makes a macro lens is the ability to take an image at life size, that means the image on the negative or image sensor is life size, so that when you blow it up it look larger that it would in real life. Being a very good optical lens it also doubles up as a cracking portrait lens. This is my normal lens for close up work and is the one the first photo was taken with. With close up work your depth of focus is very small so the lens normally needs stopping down to the max it will go, reducing the amount of light you have coming in, so I normally use a flash to light the subject. The flash I use is a 20 year old Vivitar 283, set off camera and fired by a sync lead, see picture 2.

My technique

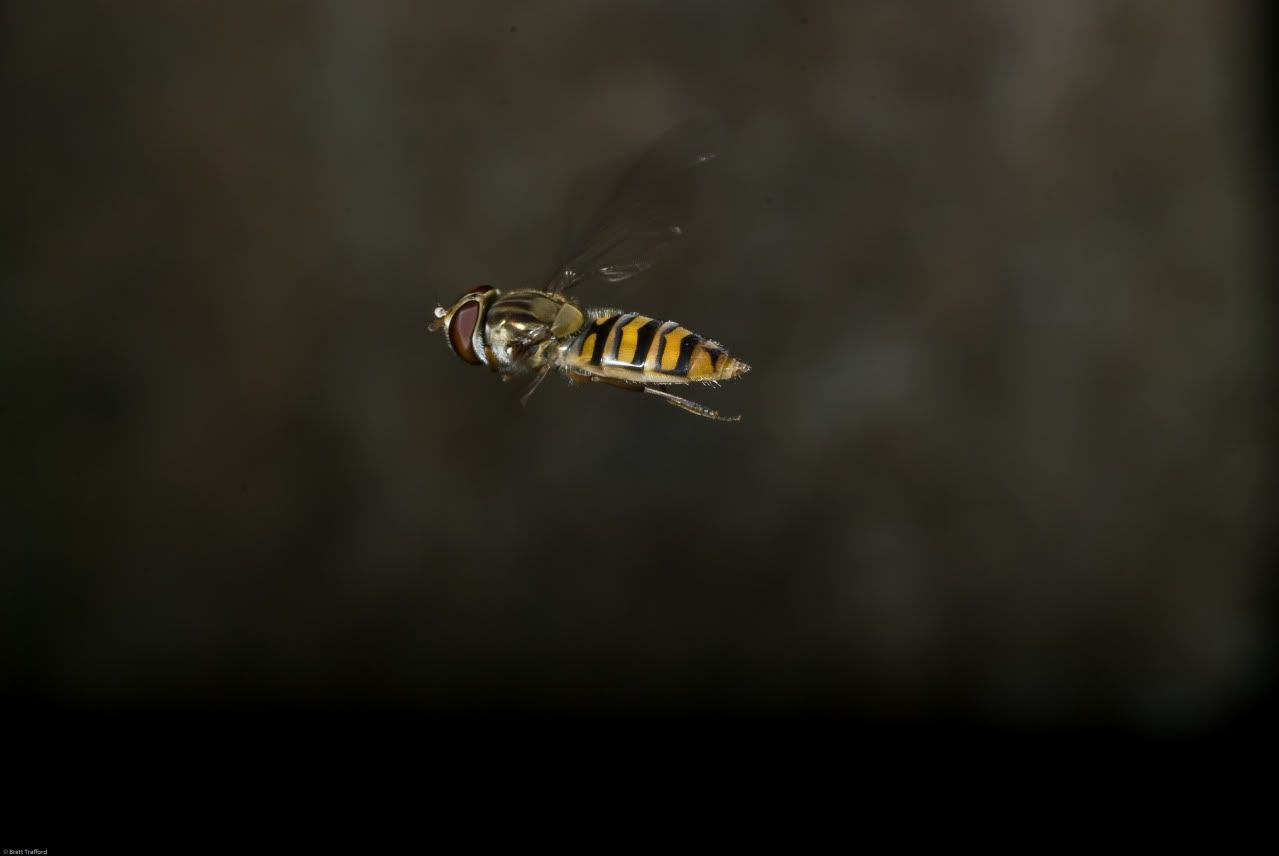
Using digital I just set the camera in manual and pick the flash sync speed, set max aperture, fix the focus and fire. I then check the shot and ether move the flash backwards or forwards, or open up the aperture until the exposure is correct. Once set I then focus on the subject by moving the whole camera knowing that when the subject is sharp in the view finder the exposure will be perfect. The only problem with this is that photographing an insect that is just over a centimetre long, with an area of focus that is only1/2 a centimetre long, while it is on a flower that is moving around in the wind, does try your patience. The shot of the Hover fly hovering was easier as it was keeping very still in the wind.

The cost

Well taking it fore granted that you have an SLR camera what is the cost of the extra kit. Well Tamron lenses come in all fittings and can be found second hand for as little as £150 (that’s for a Nikon fit others maybe cheaper) and new are available for around £250. The flash is old but still gettable as they seem to last forever I found a number on Ebay from £5 up to £30, be warned that with some cameras they might cause damage as the trigger voltage is quite high, check with the maker of the camera or the flash. The brackets and sync cords can be found for less than £10.

Cheaper option.

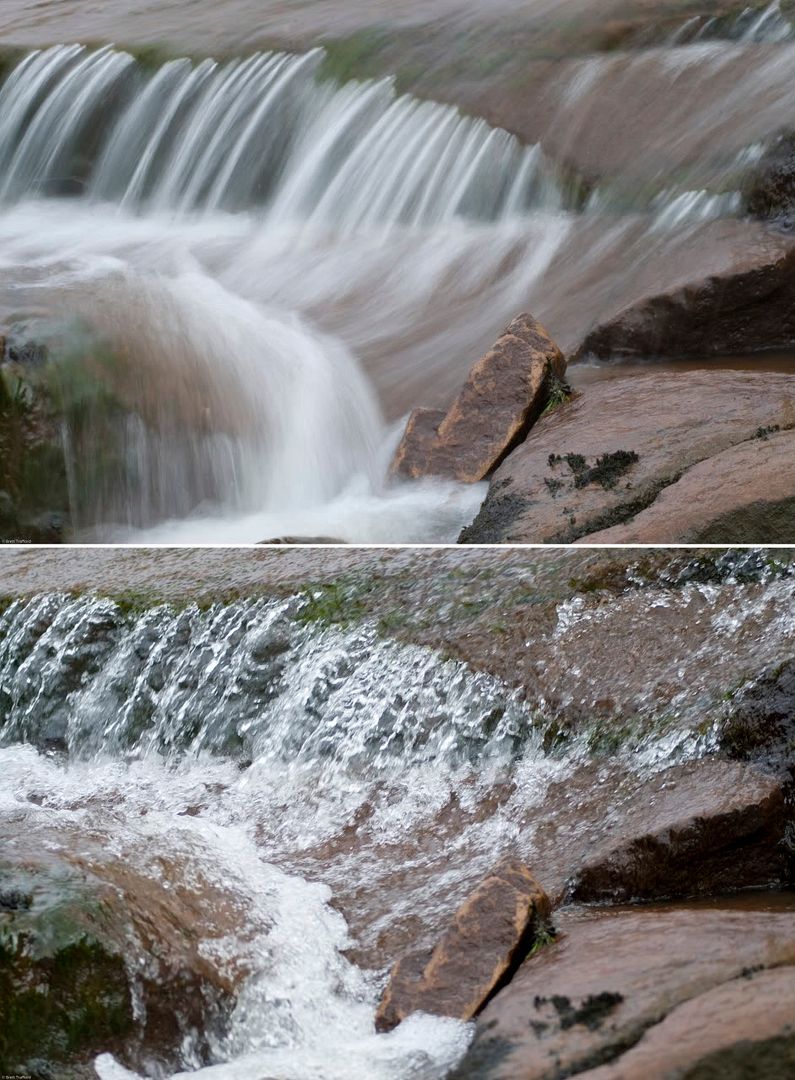
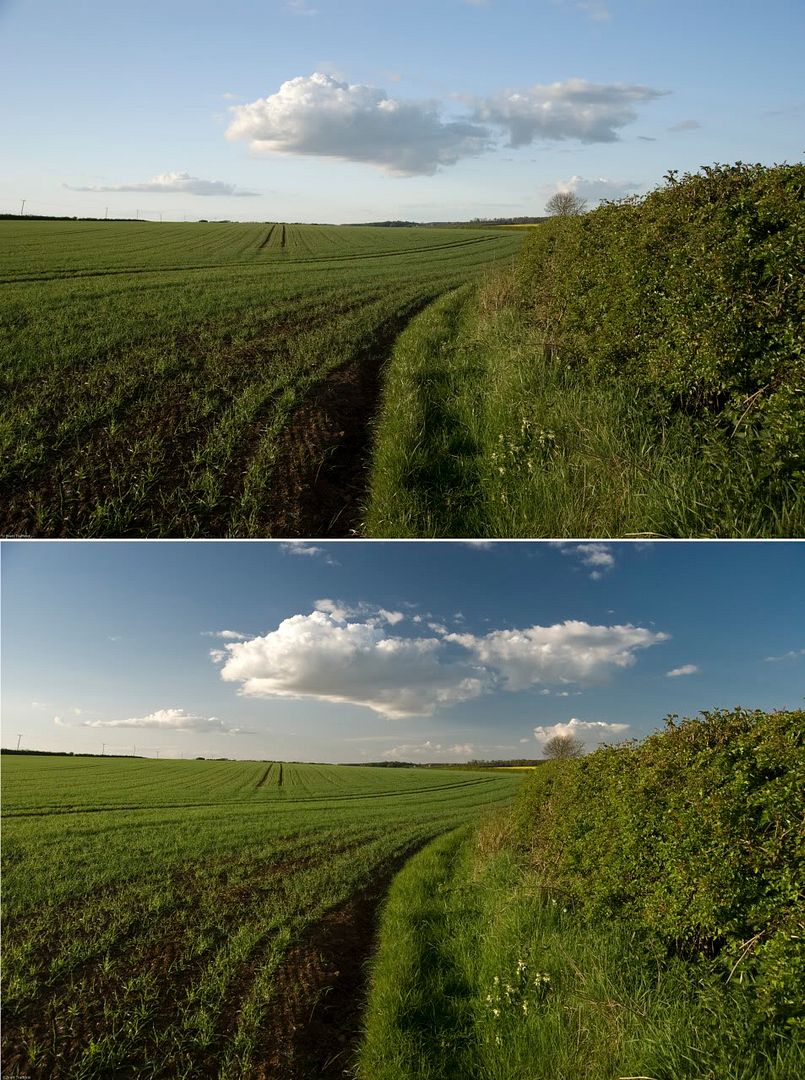
The one I favour above all others is something called a reversal ring, this lets you put a lens on backward giving you a lens that works in reverse. So a 28mm wide becomes a super close up lens, focusing to within a few centimetres of the front (back) element and capturing things at more than life size. The third photo was taken using one of these and if you compare it with the other shot you will see how much closer you can get (both shots are full frame). These rings are available for around £10-£20, and can be used with most lenses, wide zooms work very well.

Uncategorized / 3 Comments

Lesson 8 part 4

/

June 16,

/ brett365

The Tripod

My next item of must have kit is a tripod. Tripods are used to prevent camera movement and are necessary when using slow-speed exposures, or when telephoto lenses are used, as any camera movement while the shutter is open will produce a blurred image. In the same vein, they reduce camera shake, and thus are instrumental in achieving maximum sharpness.

The photo demonstrates the difference a tripod can make to a shot, the top shot shows how a slow shutter speed was used to blur the movement in the water, while in the bottom shot the best hand held speed was used to prevent camera shake, but this also froze the water in mid flow.

I have always had a tripod but have only really started to use one on a daily basis over the past couple of months. The reason for this is that they are a pain to carry around and such a faff when you are trying to set it up. Now I have spent a month or so getting used to using one I find that like anything new you do get used to it and the range of shots I can attempt has well made up for the inconvenience of using it.

Tripods come in all shapes and sizes, and can range from a few quid to hundreds of pounds. My advice when buying one is to try to get the use of one first if you can and then you will have a better idea of what you need for your type of photography. When the time comes to buy one try to get the best you can afford, these things don’t change that much over time so a correct purchase could last a life time. If possible go for one that has interchangeable heads, giving you more options in the future, and the heavier the better as they are more stable.

Uncategorized / 2 Comments

Lesson 8 part 3

/

June 11,

/ brett365

Polarizing filter

This item of kit is mainly for the SLR user but some types of polarizing filter can but fitted to compact cameras.

A polarizing filter can be used both in colour and black and white photography. They work by controlling the amount of light reaching the lens, or a least the direction that the light is traveling in, as by cutting out some reflected light the filter does some amazing things like; darkening the sky, removing reflections from water, and making foliage more colourful, colour saturation overall is also significantly enhanced.

The benefits of polarizing filters are largely unaffected by the move to digital photography, software post-processing can simulate many other types of filter, but most of the optical effects achieved by using a polarizing filter simply cannot be replicated in software.

In my opinion this is one of the most useful items of kit you can have, i always have one on my wide lens and have found that taking more than one shot with it adjusted differently gives me more options when I’m at home working on the shots.

The next 2 photo sets show the same scene both with and without a polarizer, no other settings were changed.

In this shot the sky has been darkened, making the clouds stand out more and the grass is more vibrant.

In this shot there is less reflection and glare on the water and wet rocks, giving the colour in the image time to shine through.

Uncategorized / 1 Comment

Lesson 8… Continued

/

May 27,

/ brett365

My must have kit!

Following on from the last post, what are the must have items of camera equipment?
Well as everybody wants different things from their camera, their needs for extra equipment will differ, so I will run through some suggested pieces of kit, starting with what I think is a must have item.

The camera bag

The first thing I would buy is a decent camera case, your camera will do you no good at home or if it is out with you and broken, so a good camera bag will protect it when ever the camera is not in your hands.
Cases fall into two types, the first just holds the camera and maybe some small accessories, the second will hold the camera and, depending on its size, any extra equipment you may have. The first type of bag will suit most people’s needs as it is small and easy to carry, so it won’t be left at home and you will get more use out of your camera. I have one of these for my compact camera, it’s made by Lowepro and it fits just the camera, a spare memory card and a spare battery. For my SLR I have a similar case made by Camera Care Systems, this one holds the camera and a lens along with a spare lens, spare SD memory card and battery. When choosing this type of bag don’t be tempted to make it too big as you will only fill it with stuff and then not want to carry it around.

The second type of bag is normally associated with SLR cameras, and is designed to hold your whole system, what ever size that maybe. The governing factor here is what kit you have and what you may want to take out with you. My bag of choice here is a Billingham, well designed and made to last for years, they come in a range of sizes and can be adjusted to carry your kit in a very secure way. My main bag can carry 2 SLR bodies, around 5 lenses, a flash gun and a collection of filters and leads. The only problem with this is once it’s full I cannot carry it for any distance. With these types of bag you are looking for protection and longevity, so plan what kit you will need to carry, taking in to account what items you may buy in the future as well. Also think where the bag is going and what sort of conditions it might face, a soft bag like a Billingham is fine for most conditions, but if you are looking to spend your time photographing on or around water, then a fully water proof case could well be a good idea.

Uncategorized / 1 Comment

Lesson 8, Buying a camera (or confessions of a camera salesman)

/

May 14,

/ brett365

A bit of a different lesson this one, not about taking pictures but how to acquire the equipment to allow you to do so. I spent over 4 years selling camera equipment and have also spent nearly 20 years buying it, so here are my hints and tips.

Research, research, research. What ever you are after, be it a £1000 camera or a £5 filter, check it will meet your needs, it might be the best in its class, but if it does not do what you need it to you have wasted your money. The first thing I do is type the items name into Google and see if it has any reviews done by real people in forums or on hobby sites. Then I check for the best price and if I don’t known the company that’s offering the best price I check them as well.
Let’s look at buying the main item, the camera. For most people this is a large expenditure on something that is really not vital to life, regardless of the type or the cost it is normally a big event for your pocket, so every effort to save funds and get the most out of the experience is valid.

Research

You have found the model you want and it meets your needs, then just as you are about to make the plunge and they bring out a newer model. This will happen 9 times out of 10, cameras are always changing. Check the new one out, but remember that it will normally be more expensive and that the old one, that did meet your needs just a short time ago, will probably come down in price.

Price

Once you know what you want check for the best price, then see if a local camera store will match that price (the best deals are normally on the net as the sellers have very low over heads). Why bother with a local camera store, well it has many advantages over an online purchase, the main ones being a close point of contact in case of problems and the lower risk of dodgy stock (camera manufactures sometime market different models in different areas, so a camera destined for the USA but sold in the UK may not be covered by the makers guarantee)

The transaction

If you decide to buy from a shop the main thing to bear in mind is that the profit is not in the camera, the money is normally made on the add-ons. Online check the dealers returns policy and that they confirm that the camera comes with the manufactures guarantee.

Extended guarantees

Sales pitch; the maker only expects the camera to last a year, hence the one year guarantee offered by them, and camera repairs are very expensive. So we can extend that guarantee by X number of years, just for your peace of mind.

Facts; if you have done your research you will not be buying something that only lasts a year. Most extended covers are as complex as a Middle East peace treaty and as likely to work; a lot of what is covered may already be covered by your home insurance, if not try a specialist camera policy that will cover your whole kit and not one bit.

Batteries and memory cards

Sales pitch, the maker only gives you a small battery and memory card, you will need to buy more and the only ones recommended are those by the maker.

Facts, True, but only so you will spend more money, an example Nikon EN-EL3e £35.55, non manufactures battery of the same fit £11.59. Nikon don’t recommend that you use a non standard battery, even saying that it could damage your camera and void the guarantee. Research the issue on the net, there are a lot of manufactures of batteries that have very good reputations, and in most cases the cells inside all come from a handful of factories regardless of the name on the box.
Memory cards are a different matter, they are the thing that stores the image and care should be taken we buying them. There are plenty of third party manufactures, Sandisk to name my favourite, but there are lots of copies out there so only buy from a reputable dealer, check the net, a bad card can very quickly turn from a store for your photos, into a guitar pick.

Lens protection filter.

Sales pitch, this is a must have, much better to scratch £20 of filter than £150+ of lens.

Facts; True, but shop around as these things can be a lot cheaper on line.

Tripod

Sales pitch, all the professionals use one, it’s the only way to get really good photos.

Facts, True a lot of pro’s do use them to get really good results, but for one to be any good it has to be strong (read heavy) so will you really want to carry one around with you? Wait for a while and see if you need one.

Camera bag

Sales pitch, well you have just spent loads of money now you will want something to protect it all, we recommend this bag as it’s very good and will leave you lots of room for more kit so you won’t need to by another bag.

Facts, yes you will need a bag, yes it needs to be a good one, but, I have a top end camera bag, all canvas, brass and leather, it fits all my kit and when full I can hardly lift it! So look at what you need to carry and pick a bag that does the job, remember that you will only take good pictures if you have your camera with you, not sat at home inside a large bag you just cannot be bothered to take out with you.

To sum up, research all the kit you will need, including the price. Hit the shop knowing what you need and how much you will be happy to pay. Remember there is very little profit in the camera so the salesman may well do a deal if you are taking more than one item, copies of web pages showing lower prices may help here. You may find that you are paying a bit more than if you brought from different suppliers on the net, but by buying from one local place you have more comeback if any one item fails and as a good customer you should get technical help as and when you need it.

There are tons of extras that you can buy to add to your camera, most are not needed unless you are trying to do a particular type of shot. In the shop I saw day after day people part exchanging one gadget that they had never used, normally at a fraction of its cost, for another that would just take its place in the camera bag, never to be used. As shop staff we had first pick of these trade ins and I fell victim to the same desires, with the result I have a loft full of useless bits of kit, just in case I need them!

Uncategorized / 3 Comments

Lesson 7 Composition part 2

/

April 14,

/ brett365

Then next compositional trick, if your audience is finding the rule of thirds too subtle, is using converging line. This is the photographer’s way of pointing to the important part, and basically saying

“This is the bit I want you to look at, stupid!”

This works very well on landscapes giving very strong images which end up with a very graphic feel. The converging lines can be made up of anything from paths to roads or lakesides to streams, even man made structures like the lock gate in this picture ( a more subtle trick in this shot is the fact that the girl is looking at the point of interest, most people will look at what she is looking at).

Couple this technique with the rule of thirds and you can make sure people look at your image the way you want them to.

Going along the same theme is the trick of using just one line to lead people to the main point of interest, and the line does not have to be straight, in fact in this case a wavy line can make the image a lot more interesting.

Uncategorized / 3 Comments

Lesson 6 Composition

/

March 11,

/ brett365

Over the past few lessons we have looked at the technical aspects of the camera, now we get to the more interesting part, taking pictures. The first bit to cover is composition; this is how you arrange the subject in the frame and the reason why you need to do that.

Your eye is a fantastic optical device, far better than any lens; it’s backed up by your brain, the most powerful computer on the planet. Working in combination they provide a unique window on the world, but a window that is molded by your interest in the subject in view. On the other hand your camera sees the scenes as light bouncing off objects, it gives no priority to any particular item in view, which means that the photograph has an objectivity all of its own. This is why when you see your photos they don’t match your memory of the event and why what looked like a great photo of your partner, now looks like there’s a tree growing out of their head.

This difference is one of the reasons why photography is so challenging as it makes you look at the world in totally different way, you will often hear it being referred to as “having a good eye for a photo”. Learning the basics of composition is the first step in developing this eye and the first compositional trick is the rule of thirds.

“The rule states that an image should be imagined as divided into nine equal parts by two equally-spaced horizontal lines and two equally-spaced vertical lines; and that important compositional elements (the leaf above) should be placed along these lines or their intersections (i call these hot spots)”

Once you start looking for this rule in use, you will see it every where, from films to TV, post cards to paintings. It’s the universal trick to making an image work, but why do you need to. Well as we have seen the camera does not give priority to any part of the image, so by putting the item that you deem important on a spot that will attract the most attention, you then start to replicate how your eye saw the image, making the finished photo a projection of what was in your mind when you took it.


In this shot the smallest item, the snowball, takes the attention as it sits on the junction of 2 dividing lines, with out this placement it would be lost as would the meaning of the picture. In real life, regardless of where it was, the snowball had my full attention.


The hot spot here is around where the hands join, here it just helps to reinforce the image.


With this image both the top of the paw and the cats face fall on hot spots, using the limited depth of focus helps highlight which hot spot is the important one

Uncategorized / 14 Comments

Lesson 5 – Film

/

February 28,

/ brett365

The last part of the camera we need to cover is the bit that captures the image, be it film or the CCD. As we have seen in the past lesson the shutter and the aperture control the amount of light let in to the camera to create the correct exposure, but there is a third variable, the sensitivity of the film or CCD.

In the early days of photography the image collector (Glass slide or tin plate, coated with light sensitive chemical) was not very sensitive and exposures were measured in minutes. These long exposures lead to the staged formal portraits of the time as the people had to stand very still for a long amount of time.

As the technology has improved and film replace the other mediums, exposure times have tumbled to the fractions of a second we have today, giving us the ability to freeze fast moving subjects. But the increase in sensitivity comes at a price, a loss of quality and this applies to digital as well as film.

To get a correct exposure you need to regulate the amount of light hitting the image collector, you do this with the aperture and shutter, but the sensitivity of the image collector is what stipulates what amount of light you need. As a rule of thumb for both film and digital, the higher the quality the less sensitive the image collector, this sensitivity is expressed in the film or speed rating. This rating has carried over to digital from film so the term stays the same for both, so I will refer to it as film for simplicity.
The speed rating for film is given as ISO followed by a figure. Here’s the Wikipedia explanation;
“International Standard ISO 5800:1987 from the International Organization for Standardization (ISO) defines both an arithmetic scale and a logarithmic scale for measuring color-negative film speed. Related standards ISO 6:1993 and ISO 2240:2003 define scales for speeds of black-and-white negative film and color reversal film.
In the ISO arithmetic scale, which corresponds to the older ASA scale, doubling the speed of a film (that is, halving the amount of light that is necessary to expose the film) implies doubling the numeric value that designates the film speed. In the ISO logarithmic scale, which corresponds to the older DIN scale, doubling the speed of a film implies adding 3° to the numeric value that designates the film speed. For example, a film rated ISO 200/24° is twice as sensitive as a film rated ISO 100/21°.”
So ISO 100 is slower than ISO 200, but gives a better quality image, but what does this mean in real life. Say you are taking a landscape picture in bright daylight; ISO 100 will be great, as the camera will have loads of light to play with giving you access to a wide range of shutter and aperture settings. But take away a lot of the light, say a very dull day, and you will find that the range of settings that will give a correct exposure will diminish, limiting your creative control. But by increasing the film speed you effectively increase the strength or amount of light giving back the options you had lost, at the cost of image quality.

( For the full story behind this image see my post on 365 to 42 on the 02/03/09)

It’s this balance that will decide your choice, can the loss of quality be off set by the need for extra settings. For example; will the shutter speed be too low, giving camera shake to the whole image, totally ruining it, if so does the slight loss of quality but a sharp image off set this?
The real question is, how much quality is lost, this is down to you and your use for the image, ISO 100 is great but if you only look at the images on screen or in normal sized photos it is very unlikely you will notice the difference between 100 and 400, you are much more likely to see camera shake if you shoot too slow. Shooting on film you have to make the choice one film at a time, on digital you can change the setting for each shot. Even if your usage fits the above example, I would always try to keep the quality high as possible as you never known when you may take a masterpiece that you will want to print as large as it will go.

Uncategorized / 1 Comment

Lesson 4 – Aperture and Shutter

/

February 16,

/ brett365

The Aperture and the Shutter are the yin and yang of photography, these 2 regulate the exposure and work together to affect the total image, and understanding their effect will take you along way down the road of mastering photography.

Aperture, if you look back to lesson one this is the opening that the light come through. On a camera it is normally a set of metal leaves that close in from the out side to leave a small round hole in the centre of the field of view. The wider the hole the more light can get in, if you ever hear of someone shooting wide open, this means that the aperture was at its widest. The wider the aperture the lower the number, so 1.8 is wider than 4.5, these numbers can also be seen on the lens, giving an indication of its speed, a low aperture lens is a faster one, due to the fact that wide open it lets in more light making for a quicker exposure. Due to technical restrictions, the faster lenses cost more to make, so a low aperture on a lens is also an indication of quality.

The Shutter is a metal curtain that opens and closes, very fast at times, to let a measured amount of light into the camera. The very first shutters were just lens caps that you removed for a set amount of time, say about 30 seconds, this was due to the time it took the light to effect the old types of film. Today’s shutters can move so fast that they only let in light for 8000th of a second and can be set to a wide rang of time, even up to multiple minutes.

The correct exposure for your image will be a combination of an aperture and a shutter speed, but if you move one and then move the other to compensate you will still get the correct exposure, but with 2 different settings. This yin and yang will continue until one or the other cannot make a corresponding move, giving you 10 or 20 different combinations of setting for the same exposure. Although the exposure in each case will be the same, the pictures will be affected in different ways; it is these differences that will govern your selection of aperture and shutter combination.

Aperture’s main effect is in the amount of natural sharpness it brings to the image, a smaller aperture will give you a sharper image. Now I say natural sharpness, as all cameras focus the light through a lens before it reaches the aperture. Left wide open the image taken just using the lens to focus will have a very narrow band of sharp image, think of a portrait with a blurred background. With the aperture closed down, that same shot will benefit from the sharpening from the aperture and have a detailed background. As we known the smaller the aperture the less light gets in so we need a longer shutter speed to get the right exposure.

The shutters effect on the image is mainly the way it effects movement. Take a picture of a bowl of fruit, this is not going to be moving, so how ever long the shutter is open the image will not change, but take a picture of a jet flying past and in a second it will have come and gone. By taking the picture at a fast shutter speed the amount of time the image is exposed, gives the jet no time to move across the CCD or film, leaving you with a sharper image as it will have no movement blur. The shutter also effects camera movement, as unless you have the camera on a tripod it will be moving by a small amount all the time, this is called camera shake. A faster shutter speed will also stop this from showing, a rule of thumb for hand holding a camera is a shutter speed to match the length of lens, so a 50mm lens need a minimum shutter speed of 50th of a second and a 300mm lens one of 300th of a second.

Put these 2 together and you get to the heart of camera settings, a trade off between speed of shutter and depth of focus, the auto setting on the camera will try to balance these two, giving a middle of the range shutter speed and aperture. A sports setting will try to pick the fastest shutter speed, to freeze the action, the landscape setting will try to pick the smallest aperture to give the greatest amount of sharpness in the image, and both will limit the selection based on the settings that give the correct exposure.

In most instances you will stick to these guidelines, but you could do the opposite, use a slow shutter speed on a fast subject to inject some movement into the image or a wide open aperture on a landscape to make only one item stand out as sharp. This can be done on a camera with only a limited number of settings if you pick the wrong one for the subject, as the camera will not know what it is taking and just do as its programmed.

Uncategorized / 4 Comments

Lesson 3 – Exposure

/

February 9,

/ brett365

We have looked at the basics behind photography and touched on the different types of camera, now to start to put the bits together.
I’m starting with exposure as it gives you a better idea of what is going on both physically and mentally in your camera.
Exposure is the term for the amount of light that hits the image collector, be it film or a CCD, a correct exposure means that the image is just the right brightness. Most cameras have an auto function on them that will set up the shutter speed and aperture to get a perfect exposure every time, well nearly every time.

Lets go back and look at the term “correct exposure”, all photography is based on personal taste, what is right for one person is not for another, each photo needs treating separately, how does the camera decide what is right? It can’t, all it can do is follow a set of basic rules of thumb and try to get close to what you want.

The camera does not see a photo as you do, its not little Jimmy playing in the snow, or fireworks over the city, it’s a small dark area against a large white area or a large dark area with pin points of light. For you the small dark bit (little Jimmy) needs to be exposed correctly, the camera see that the larger area is more dominant and exposes that. Most cameras take a number of readings from the image area and find an average mid point, if 90% of the image is light and 10% dark the average will lean very heavily to the light side, shortening the exposure and leaving little Jimmy looking very dark. With the fireworks being mainly dark you will get a long exposure leaving lots of detail in the city but a mass of bright streaks in the sky. In both cases the camera will have done its job, a correct exposure for the bulk of the picture, it’s just missed the point that you were trying to make.
Understanding how your camera thinks helps you get the best out of it, knowing what it will do to little Jimmy you have the option of making him more dominant in the picture, forcing the camera to take more notice of him. The easiest way is to make him bigger in the picture, but you may be lucky enough to have an exposure lock on the camera. An exposure lock does what is says, locks the exposure, the most common way is by ½ pressing the shutter button when pointed at the item that you want correctly exposed, you then re frame the shot and finish pressing the button. The camera will take the shot but expose it as if it was looking at something else, that something else being the item you wanted correctly exposing.

Another way is to shoot manually, if you have the option, on digital it can be as easy as shooting, looking at the image, adjusting the aperture or shutter speed and re-shooting until you get the right result, if you are doing lots of the same shot, once its set right you can usually leave it.
With film it can be more costly as you wont known what is right, so you do what is called bracketing, shooting a number of different exposures so that at least one is right.
Your camera may also have different metering modes (metering is the term for taking a light reading for exposure) these are normally just different ways that the camera judges the light in a picture, so instead of using an average for the whole shot it will maybe treat the center of the image as more important, so that little Jimmy’s 10% becomes more like 50% (this is called centre weighted) or it could take a spot right in the center and make it the most important part, turning little Jimmy into 100% (this surprisingly is call spot metering). If you can use spot metering with exposure lock, then regardless of the conditions what you deem important will be exposed correctly.

A lot of cameras come with program modes, these are auto modes but with a twist, the camera will have been set up to take certain types of image, landscape, night time or back lit, and by selecting the mode it will try to retake that type of image again. So for little Jimmy the back lit mode (as the snow behind will be a lot brighter than he is) will adjust the exposure to compensate.
Now comes the fun part, do you really want to see little Jimmy’s smiling face, or artistically is the small dark, featureless figure, against the vast snowfield more pleasing to you. As I’ve said before exposure is down to personal taste, your camera will try to help but don’t be afraid to show it whose boss, correct exposure is what’s correct for you.

Uncategorized / Comment

Post navigation

Older 1 … 7 8 Newer Load more
 ©  Brett Trafford Photography. All Rights Reserved.        brett@bretttrafford.com        tel 07801 058345